Friday, 30 May 2014

Introducing UGU


Introducing UGU, my 1969 Mercedes-Benz W114 250C. Her name is the result of her original registration plate and is pronounced u-goo.

Purchased in March 2012 she has motored her way into my heart and is very much considered a part of the family, even staring as our wedding car in 2013.

Designed by the legendary Paul Bracq, the W114 sedan rolled of the production line in 1968 followed the next year by the coupĂ©.  This makes UGU an early series one W114.

Powered by 2.5 litre straight six with twin Zenith carburettors, she was considered a sporty car in her day.  The engine is coupled to a four speed, floor mounted automatic gearbox which sends power to the back wheels.
Independent suspension, power steering and disc brakes both front and rear make UGU a very usable classic car even on today's busy roads.

These links and video offer an insight to the designer and the car for those that are interested:


Knowing your car - Mercedes-Benz

It is very important to know and understand what your car is.  A great place to start is by getting a copy of the vehicle data card.

If you are lucky, you may find a copy of this pinned to the reverse side of the back seat. If however you look and cannot find it, like in the case of my car, don't worry as you can still get a copy from the Mercedes-Benz Classic Centre.


A simple email to the Classic Centre requesting the data card and stating the vehicles VIN # was all that I needed.  Within a few days I received an electronic version of the data card complete with the translation outlining the information content.


Translation:

VIN #                  114021-22-002510
Engine #            114920-22-016424
Transmission#  35438
Type                   250C
Tyres                  Conti (continental)
Date                   October 4, 1969

050   Paint colour. White
140   Interior Trim, Cognac MBtex
401   Single seats
426   Mercedes-Benz power steering and automatic transmission with floor shift
461   Instruments in English
490   Without air-cooled oil cooler
502   Outside rearview mirror on right
524   Paintcoat preservation
587   Front folding armrest
598   Heat-insulating glass
625   Version for Australia
243   Elimination of battery

I will admit that it is difficult to relate some elements of the translation to the data sheet, but I do not think this really matters.  All the information you need to check if the car has survived the last 45 years unmolested is right there.

Tuesday, 20 May 2014

Headlights (part 2) Setting

So now that the new headlight units are installed it's time to set the beam to ensure that you are getting the maximum out of the emitted light and not blinding oncoming traffic.

There is lot and lots of information online including detailed videos and instructions on how to do this.  I watched and read lots of them and they all generally say the same thing.  In summary this is what I did.

Step 1. Remove all cargo from the boot and interior of the car unless it is regularly carried.  It is recommended that the car has half a tank of fuel,

Step 2. On a flat level surface, drive the car square up to the garage wall,

Step 3. Using masking tape, make a vertical mark on the wall to locate the centre of the car, (This was made very easy by the Mercedes-Benz bonnet emblem)

Step 4. Make two further vertical marks on the wall, one at the centreline of each headlight.  If you measure the distance of these markings to either side of your car centreline, the measurements should be the same.  If not, recheck your measurements,

Step 5. Roll the car back slightly so you can get between it and the wall.  Using a measuring tape, measure the height of the centre of the light bulb from the ground.  Mark this height with a horizontal line on the wall.  Note it should makes a cross on the wall as it passes over the vertical headlight centreline made previously,

Step 6.  Move the car back 5metres from the wall ensuring it remains square with the garage wall,

Step 7. Turn on your main beam headlights.  The most intense light should be adjusted to focus on the cross you have made on the wall.  It is best to concentrate on one light at a time so cover the other with towel or blanket.  

I found by screwing up my eyes and squinting it made it easier to see where was the most intense light focus.

Step 8. Keeping in mind we are dealing with a RHD car, by switching the lights back to low beam, the light focus will drop approximately 75mm below the horizontal line on the wall and to the left of the vertical line, towards the pavement.

Step 9.  Repeat this process for the other headlight.

As I said before there is heaps of information on-line but this process worked for me.


Main beam turned on prior to adjustment.  The right hand side light was pretty good, but whilst the left was at a good height, the beam needed to be aimed further left to hit the marks made on the wall.


Low beam turned on prior to adjustment. As you can see the light focus drops to the required height but the left light is very far right of the vertical mark on the wall.


Main beam lights and lower fog lights on.  All working and set as required. All I needed to do now was fit the chrome trim and........


... take the car for a drive in the dark.  As you can see the spread of light in front of the car is even and illuminates the pavement ahead.  Job done!

Monday, 19 May 2014

Headlights (part 1) Installation


About six months after buying the car, and following many washes, polishes and general admiring of my new coupe, it was a friend that pointed out to me that the car had two different styles of headlight. How I never noticed I am not quite sure, but after the obvious was pointed out to me I could suddenly see the elephant in the room, which unfortunately meant that every time I looked at the car the mismatched lights was all I could see.

The difference was that one headlight was the original type with a lovely bevelled glass lens, the other was a replacement from a later series 2 model which has a flat lens and H4 written on the glass.  The difference is subtle and the majority of people would never have noticed, but to me this scar on her face had to go!

Follow a few months of searching on-line, a set of bevelled headlights came up for sale on Gumtree and I snapped them up for a very reasonable $80AUD

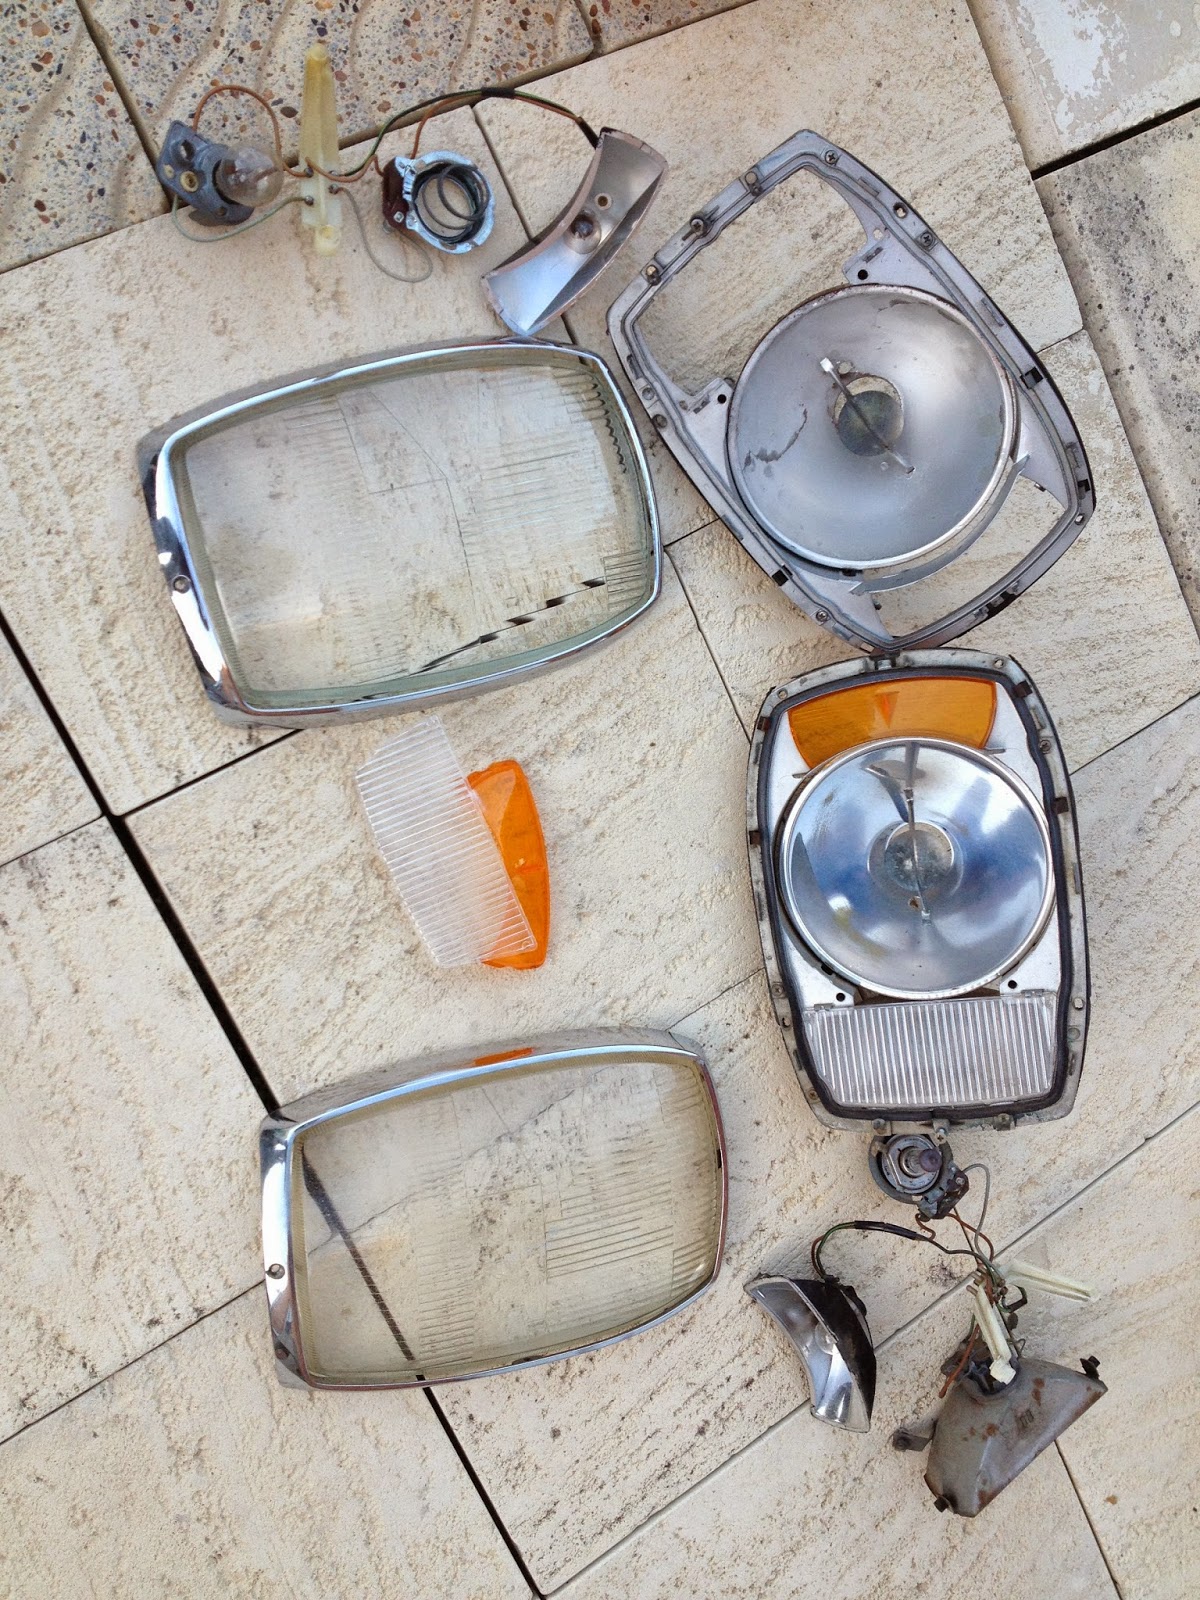
As soon as I got home with my new purchase I set to work removing the headlights from the car before dismantling them, and the new units.  With all four units in pieces, all parts were cleaned, before I selected the best bits and built up two good, matching headlight units.

This was all very straight forward and only required a few screwdrivers.  My only advice would be to handle the reflectors with extreme care.  Not knowing how fragile they were, I attempted to wipe one of the dirtier reflectors with a damp cloth to remove the grime but discovered that this was enough to remove the silver coating!  So, of to the bin with that piece.

With the new headlights assembled and looking significantly better as a matching pair I re-installed them in the car, remembering not to refit the finishing chrome trim at this point as I would need to check the alignment of the light beam.


New set with bevelled glass lenses sourced...


Headlights removed from car...


All bits cleaned and best parts selected...


New matching set ready to be installed...


Left over bits.  You can clearly see the two different styles of glass.  The one on top has much squarer edges, this is the series 2, H4 lens.  Reflector in RHS unit has no silver coating left after a gentle wipe with a cloth. DO NOT DO THIS! Also fog light reflector on same unit has no silver left and rust is setting in...


New matching set installed minus the chrome trim so that headlight beam can be adjusted.