Friday, 3 April 2015

DON'T TOUCH MY STUFF!!!!

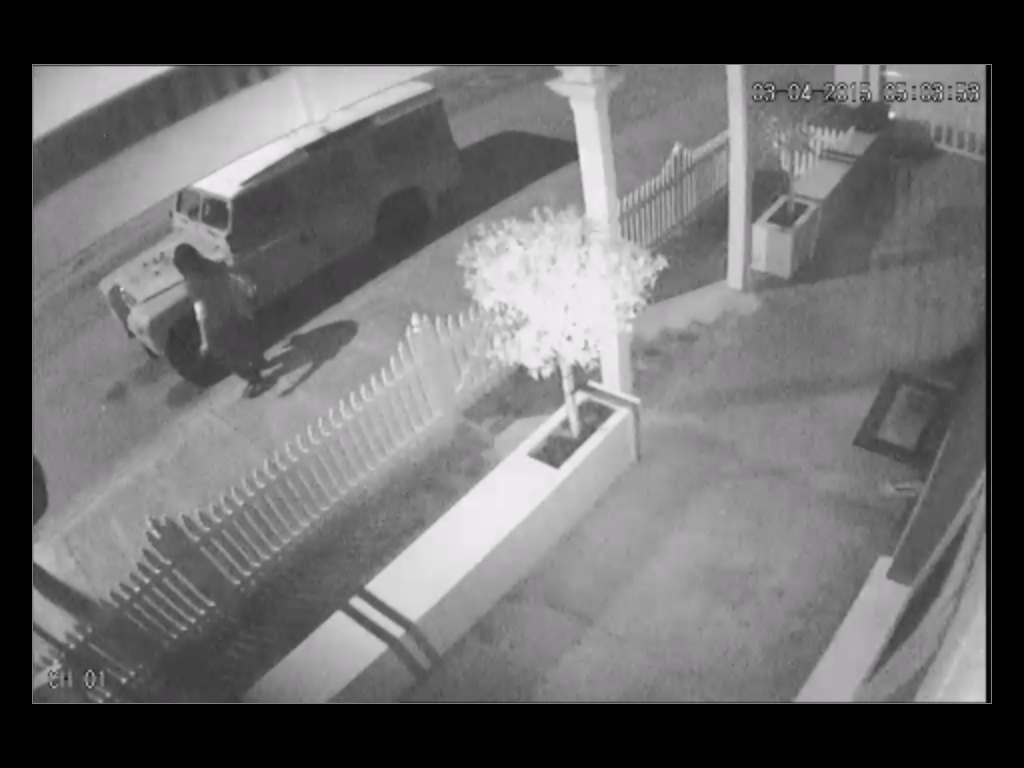
This morning at 5:03am I am disgusted to say that an individual broke into Leif and spent a further 6 minutes either trying to steal him, or just going through the items inside.

It makes my skin crawl to think someone has been going through my things. I work bloody hard for what I have - what gives you the right to take it from me!!!!

If anyone in the vicinity of Lake Street or Brisbane Street saw this individual, please report them to the Police by calling the non-life threatening number 131 444.

Thankfully nothing of importance was taken, but oddly he stole my visitors parking pass. Have parking issues come to this!

5:03am - Individual arrives from Lake Street and checks out the front of our house.
Looks to be a tall, solidly built man with long brown hair.
Distinctive bag, dark skinny fit trousers and two layers of clothing, one dark, one white

 5:03am - Peers inside

 5:03am - tries and fails to force open front window

 5:03am - moves onto the back window, also fails to gain access

 5:03am - failure to gain access moves to driver's side


5:03am - Forces open the driver's window and door

5:09am - Some 6 minutes inside going through my stuff he leaves heading toward Brisbane Place.

Monday, 9 March 2015

Love of the Shiny Bits

I think everyone will agree part of the charm of classic and vintage cars is the extravagance and quality of the chrome detailing. There is little better than seeing your cars shiny bits sparkling in the sun just after being polished; perhaps this is why modern day cars still show off the odd chrome detail here and there, but we all know it is not what it used to be, nothing more than bits of shiny plastic.

UGU on display at the Northam flying 50, 2014

Disclaimer: Please do not attempt the following on "plastic chrome" as I have no idea what the result would be.

I have been very fortunate in UGU, she doesn't have much rust to speak of, and her chrome work still has lots of shine, but there are a few bits that could do with some attention, like the strips that cap the doors at the window line.

As with all things UGU related, I am somewhat reluctant to have a go at fixing her just in case I do it wrong, so when a friend explained to me how to get the best out of your chrome, I filed it in my memory and did little more,  until now.

Land Rovers are not known for their bling, but Leif does have a few bits - headlight trim, windscreen wiper arms, and steering wheel spokes.

They were all a bit tarnished, so I decided to bite the bullet and have a go at cleaning the headlight surrounds, thinking that if I damage them, it is not the end of the world.

With the trims removed I gave them a wash to remove the dirt and grime and left them in the sun to dry whilst I went to the hardware store to buy some superfine steel wool.

Washed, scrubbed and dry; and still looking awful!

My only prior experience with wire wool is a Brillo Pad.
 DO NOT use a Brillo Pad

Good for pots, rubbish for chrome!!

Sitting in the sun on the Verandah at the Tyro Workshop, I gently started rubbing the super fine steel wool over the tarnished headlight trims, in no time at all, the results were clear to see.

Bling vs Ming

So after about an hour I had both trims polished inside and out, and could not believe how well they polished up with absolutely no scuffing or scratching from the steel wool.  So there you have it, how to get your chrome from Ming to Bling for less than $5.

With these rings, I thee wed, haha

You gotta be happy with that, haven't you?

With my trial complete and expectations high, you had better get your sunnies ready for the next time UGU goes for a drive!

UPDATE:  Since my initial posting of this article, I have been advised that if you keep the wool wet, you will get an even better result.  I will try this with UGU and keep you posted. 

You never stop learning.  Thanks G. Abbott


Friday, 6 March 2015

Ready for the weekend

Following last week's exciting parts find, I am returning to the same place tomorrow to dig a bit deeper and see what else I can find.

Before bringing more parts home, I thought it was best to reduce the mounting pile residing on my verandah, which several days ago copped the disapproving comment of ".... are you starting a salvage yard?" from my Father in Law.  Honestly, some people have no appreciation of historical artefacts, haha!

Last weekend's "Historical Artefacts" after a good wash and dead bug removal 

So, in keeping with the saying "a picture says a thousand words", here is a photo diary of Leif's replacement door install.  I will admit the colour match is off a bit, and the hinges still need aligning, but I will sort that out when the hinge repair kits I have ordered arrive from the UK.

"Beauty is only skin deep." This was certainly true for Leif's passenger door.  The external skin was relatively crease and blemish free, but the frame behind it was in a terrible state.

Yuk...

...YUK...

...YUKIER...

...YUKIST!!!
This is supposed to be the sliding window channel!

Off with her head! Well, door top to start with

Door bottom removed, and pre-owned door is ready to be installed

Pre-owned panels installed and working.  
Paint will come later, probably in line with the time I win Lotto, haha

This simple process has made me realise that I need to correct my terminology.  Previously I have referred to Leif as a "restoration" project, perhaps "renovation" may be more fitting as she will not be returned to her former glory, rather she will be given a new lease of life.  

Further to this, I have had several Tyrobenz followers ask why I refer to Leif as a "she" considering the masculinity of the vehicle and the origins of the name.  I had always thought all modes of transport were female as they are in the french language, but to keep the peace I have done some research and it's time for Leif to have a sex-change.  From here on she will be a he, and he will be a renovation project!


Have a great weekend everyone!


Sunday, 1 March 2015

Perth's hidden Land Rover Heaven.

I am still so excited that I can hardly sit still to write this post.

Last weekend I followed up on an advertisement on Gumtree for a "General Garage Sale" which included Land Rover parts.  Having missed that sale, I got in contact with the seller, a lovely guy called Joe, to see if I could come another time. We agreed to meet at 9:30am the following Sunday.  That was today.

I pulled up outside the suburban house and saw a huge pile of wheels and tyres outside, but nothing prepared me for what I found inside the gates!

Joe told me that his dad was a bit of a hoarder and loved Land Rovers.  Having recently passed away, Joe and his brothers were now clearing out the house, so bare in mind the following photographs are after a serious culling had already happened. God knows how excited I would have been if I had had first dibs on the parts.

 Wing skins and storage box covers

 Bonnets, Series through to Defender

 Doors

 Axles, drive shafts and who knows what

 Series 2 Radiator Grille (Yep that is mine, on hold waiting collection)

 Panels and stuff

Transmission covers, sun visors and sills 

 D- Rings, one on top is going on Leif

 SWB side panels and tail gates, oh and a lawn mower, non Land Rover haha

 Windscreens

 Fuel tanks

 I don't know what all is here but some of it is new

 Assorted hoses, new but don't know how old

 Wings and truck cab panels

 Rear tailgate returning to nature sadly, these are hard to find normally

Winches!!

I spent several hours looking through the parts, which must have included at least 10 dismantled Landy's but also brand new, still in packaging bits.  It was amongst that I found my most pleasing purchase; a brand new rear view mirror, complete in it's unopened Rover box!
Brand New, un-opened and mine!!!

There was so much stuff I didn't get to look at half of it, and not knowing what Leif actually is going to need, I didn't snap up any of the axles, prop shafts, bearings, gauges and god knows what else was hidden there.  I have a feeling I will regret that!

So with wifey's Volvo filled to capacity I took home:

Series 2 radiator panel
Two wing skins
Original gear knob still with numbers visible
Transmission tunnel
Front apron
Series 2 side skirts
Dash board cluster surround
Wiper motor cover
Passenger door which is near perfect
Passenger front door top
Rear door handle
D Ring
Rear view mirror
Leif's new parts

Leif didn't actually need some of these parts, but as her paintwork is so rubbish I figured if I could get good panels with a better paint finish then it would be less prep work later.

Anyway, if you are a Series Land Rover owner in Perth and need parts, please get in contact and I will pass on Joe's details.

Friday, 27 February 2015

Leif, Noooooo!!!

February may have been the month of love with Valentine's Day on the 14th, but, sadly there was no love at the Tyro Workshop as Leif decided to dispose of the only other Land Rover in my life!

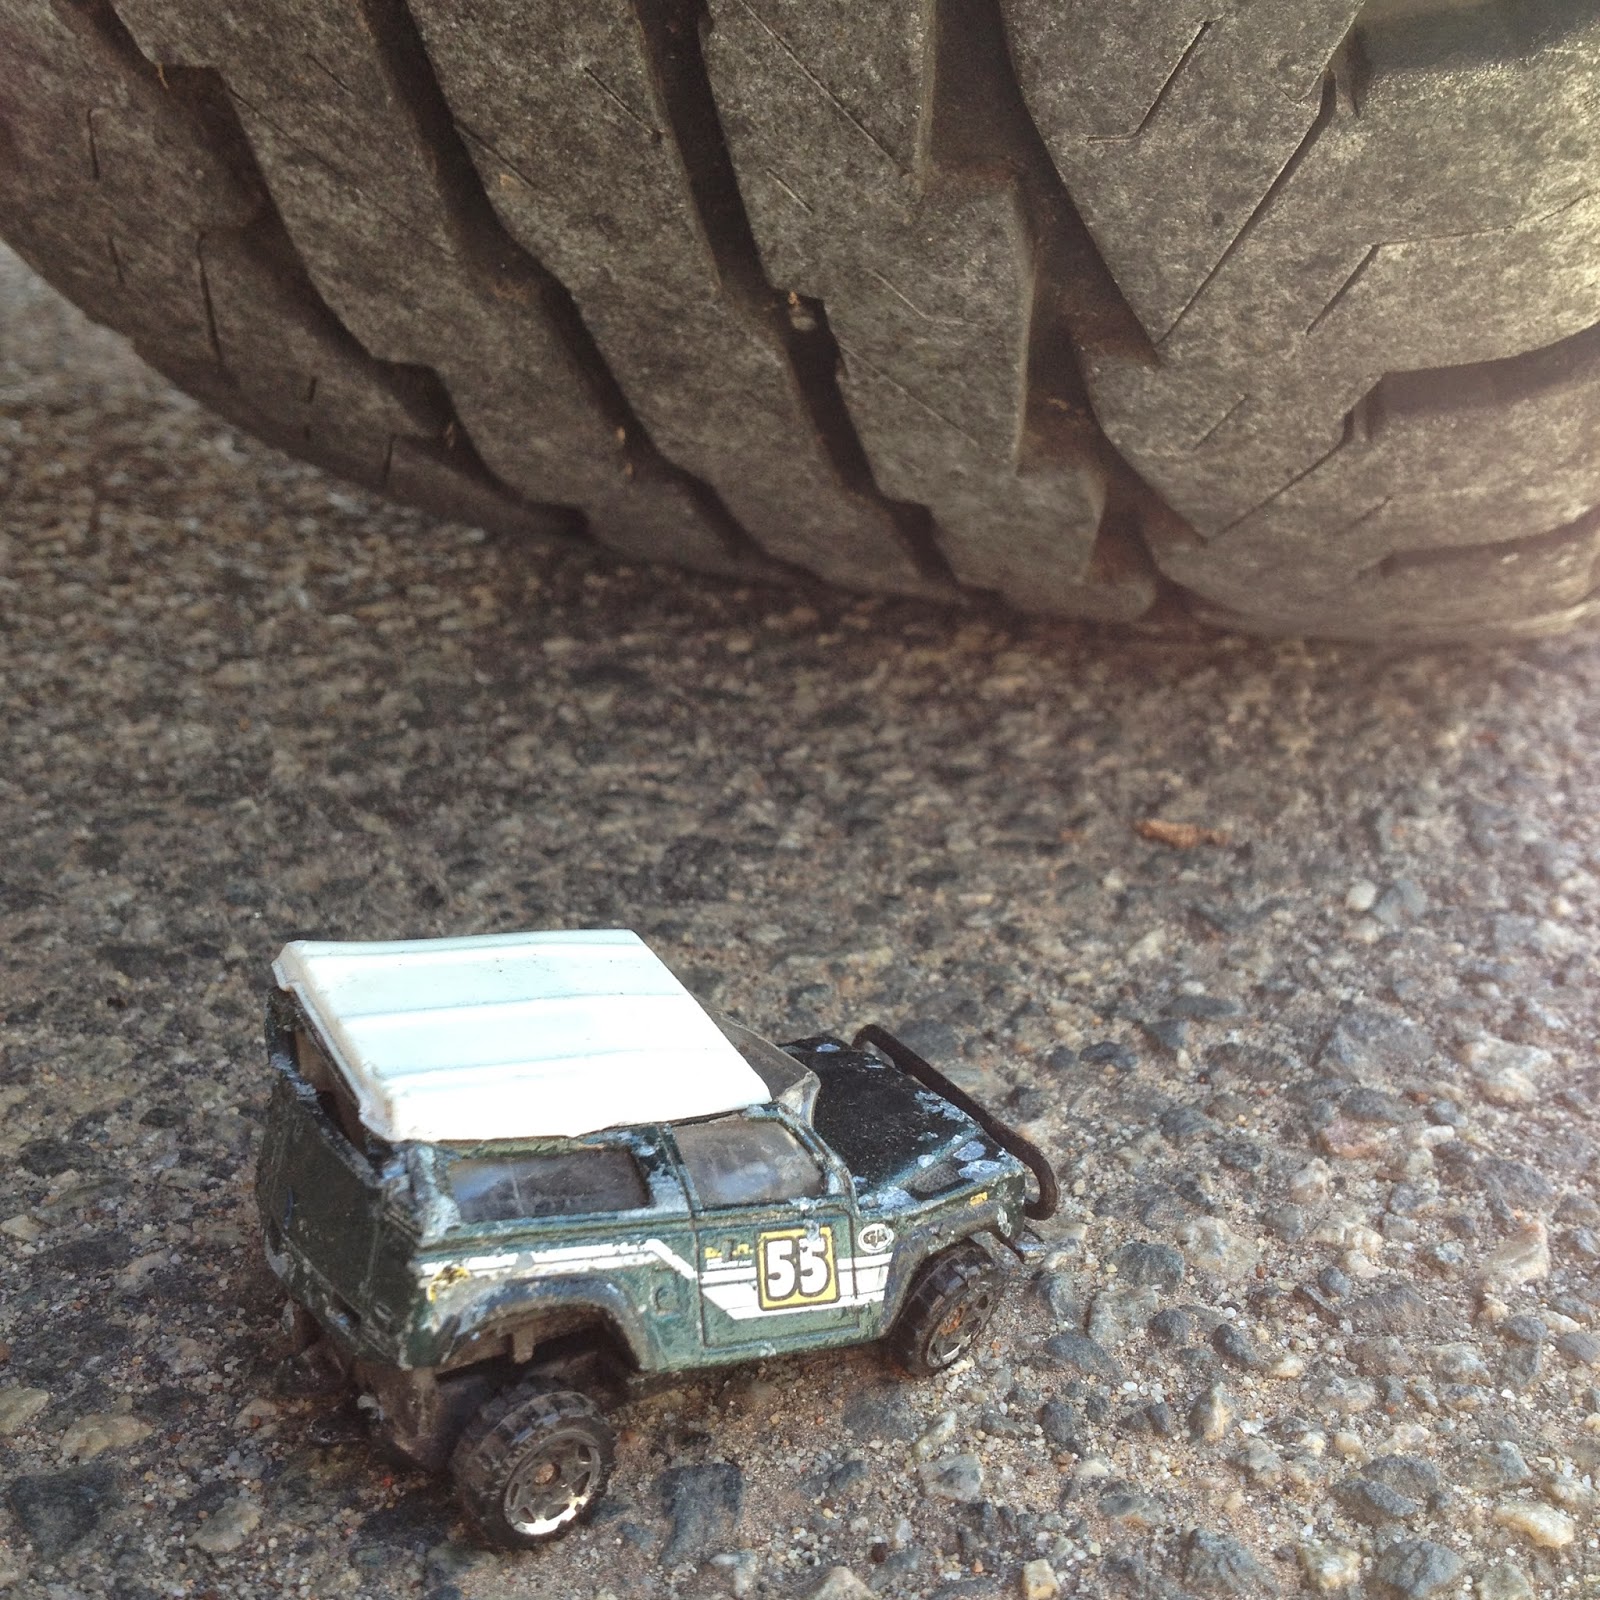
"Mini-me" - my awesome second Landy that came as a surprise with Leif's purchase

As I have been tinkering with Leif and checking out the condition of the chassis, I have removed the front passenger floor plate and transmission tunnel for a better look; eventually I will remove the seat box and rear floors for a better inspection but I will report on that at a later date.

Foolishly, with Leif's battery getting low, I decided to start her up and move her from the back to the front of the Tyro Workshop. As we moved forward, "mini-me" drove off the dashboard, through the open floor and under Leif's wheels - I think she's a write-off -  gutted!

I suppose on the positive I now know what to ask wifey for as a present for my upcoming birthday.

I don't think that is going to buff out :(

Wifey, if you're are reading, hint, HINT!!!
(I don't think that you can get a Series 2A Model)

Sunday, 8 February 2015

First things first, we need to stop!

With Leif off the tow truck and home for a few weeks, I hadn't done much more than look at her and think about what I was going to do, or at least try to do.

Leif is a long term project and, to be honest, I am in no rush to get her back on the road.  If I want to go for a drive, or hang out with some fellow enthusiasts and car club members I will take my beloved UGU. I will admit that this luxury of choice makes me feel not only very spoilt, but very thankful for my understanding wife.

I have no illusions that Leif will be some amazingly comfy and thrilling vehicle to drive, or that she will be some sort of show vehicle or extreme off-roader; this project for me is all about the process, with no timeframe and no predetermined outcome.

From the moment Leif arrived on the back of the tow truck I knew there was an issue with her brakes, as the brake pedal would go all the way to the floor with no resistance and no stopping power at all, highlighting the first job I needed to attend to.

Brake pedal goes all the way to the floor with no resistance
(Check out those safety boots haha!)

Having moved Leif from the front to the back of the Tyro Workshop I had worked out that if you pumped the brake pedal in rapid succession, after the seventh or eighth pump there was enough brake pressure to stop from a slow roll.  This, combined with the knowledge that the previous owner had recently replaced the master cylinder made me believe that there was air in the system.

I reached for my repair manual and went on-line to see how to fix the problem.

The process of bleeding the brakes is really very simple even if you are doing it on your own as I was.  (If you have a friend close by that you can ask to pump the brake pedal as you lie under the vehicle and do the messy bit, it would be even easier), however doing this on my own I did some research and bought a vacuum pump off Ebay.

New tools.  Vacuum pump and new brake/clutch fluid

I located and examined all Leif's bleed nipples. Over the next two days whilst I waited for the vacuum pump to arrive I gave them a good soaking with penetrating oil to try and free them up as they were seized solid.  This duration seemed to be the perfect amount of time for the oil to do its work, and by the time I had figured out how to use my new tool the bolts were nice and free.

To get started I removed the lid from the fluid reservoir and filled it to the brim with new brake/clutch fluid.  This would later allow me to see if the level had dropped.

I will admit there were various opinions about the order in which to bleed the brakes, but I followed the brake lines to the back end and connected the vacuum pump to the passenger side wheel after deciding it was the one furthest from the master cylinder.

I squeezed the pump to get pressure into the tube and watched the gauge to make sure there were no leeks before opening the bleed nipple.  If you can't get a airtight seal I did read that grease could be used around the end of the tube to seal it to the bleed nipple, but I didn't need to do that.

Vacuum pump tube connected to a well soaked bleed nipple

With the bleed nipple open I filled the pumps reservoir in accordance with the product instructions, and locked off the nipple before disconnecting the pump having seen no bubbles escape into the fluid.  I moved onto the other rear wheel, then passenger front before finishing on the front driver's side.  Between each wheel bleed I returned to the reservoir and topped up the fluid making sure that no air could re-enter the system.  I also checked the brake pedal to see if there was any resistance; to my delight there was now a bit.

I had seen a few bubbles come out during the process but it was not until I got to the front driver's side when I witnessed a lot of bubbles escaping into the vacuum pumps reservoir.

Vacuum pump doing its thing on the front driver's side

Bubbles in the system

With the brakes bled and the reservoir full again, I was so pleased to have a nice firm brake pedal.  I jumped behind the wheel and slowly drove around the block checking that everything was working and, to my relief, it was.

It is pretty nerve racking driving a vehicle for the first time, knowing that the only way of stopping it is via something you have just done, also for the first time.  With that said, the feeling of exhiliration when it all works as it should is very, very satisfying!

Lets hope this sets the tone as I continue on this restoration journey.