Showing posts with label Tyro Part Mart. Show all posts

Tuesday, 28 April 2015

More lenses than your local optician!

For those of you who follow my blog, i know there is at least one of you (thanks wifey xx), who will know that only last weekend I saved a heap of parts from the tip. Today I took some time to sort through the box that I had just filled with stuff when there.  It was like Christmas - so many cool things some of which will be kept for Leif.  So what did I have in the grey mystery box??

The mystery box.....


Ta-da!!!!
I now have more lenses than I can reasonably hold under the "just in case" banner so many of these will be up for sale.

This is not the full contents of the box, there were many more contact sets, a few gear knobs, and a speedo that reads in MPH and KMH - Leif might be getting that even if not original to him.

And so to the close ups, quantities excluding Leif's and costs.  I will post to anyone that needs at an additional cost depending on quantity and location. Price negotiable on multiples.

Wipac Side light lens and screws in original unopened package. 

Part #: R542050 / S3473
Condition: New Old Stock, unopened and unused complete with screws
Quantity: SOLD OUT
Cost: $4 each

Rover, Land Rover, Leyland side light lens in original unopened package.

Part #: 589283
Condition: New Old Stock, unused and complete with screws
Quantity: SOLD OUT
Cost: $4 each

Unipart side light lens in original unopened package.

Part #: 589284
Condition: New Old Stock, unused and complete with screws
Quantity: SOLD OUT
Cost: $2.50


Rover, Land Rover unused indicator lens.

Part #: 6220-66 / 020-3220 or 542048
Condition: New Old Stock, unused complete with screws. Tape to hold screws in place
Quantity: SOLD OUT
Cost: $4 each

Wipac tail/stop light lens with reflector and screws in original unopened package.

Part #: R542044 / S3472
Condition: New Old Stock, unopened and unused complete with screws
Quantity: SOLD OUT
Cost: N/A


Wipac tail/stop light lens with screws in original unopened package. (No reflector)

Part #: S3472
Condition: New Old Stock, unopened and unused complete with screws
Quantity: SOLD OUT
Cost: $10


*RARE* Wipac tail/stop light lens with reflector and number plate light illumination section.

Part #: S170
Condition: Used but in excellent condition, no cracks or stress marks
Quantity: SOLD OUT
Cost: N/A


*RARE* Tail/stop light lens with reflector and number plate light illumination section.

Part #: KL-21
Condition: Used but in excellent condition, no cracks or stress marks. This is the same size as the Wipac, but the reflector is smaller
Quantity: 1
Cost: $20


Wipac tail/stop light lens with reflector (USED).

Part #: S170
Condition: Used
Quantity: SOLD OUT
Cost: $7.50 each

Bedford Tail/stop light lens with reflector and number plate light illumination section.

Part #: 1594
Condition: Used but in excellent condition, no cracks or stress marks. 
Quantity: SOLD OUT
Cost: $15 each 

Just needs a clean, which I will do before postage / collection


Side light lens, one with housing.

Part #: N/A 80mm diameter with 45mm projection. Rebated edge to fit housing
Condition: Used but in good condition. 
Quantity: SOLD OUT
Cost: $15 for the pair


I don't know what these are!

Part #: S350 A2 / PRC 1814
Condition: New Old Stock, unopened and unused
Quantity: 7
Cost: Open to offers if someone knows what they are


Part #: S350 E7 / PRC 1814
Condition: New Old Stock, unopened and unused
Quantity: 2
Cost: Open to offers if someone knows what they are 

Lucas condesner.

Part #: C4 / 54425179
Condition: New Old Stock, unopened and unused 
Quantity: 3
Cost: $2 Each


Lucas contact set.

Part #: GL 19v
Condition: New Old Stock, unopened and unused 
Quantity: 4
Cost: $1 Each

Lucas contact set.

Part #: GL 769
Condition: New Old Stock, unopened and unused 
Quantity: 2
Cost: $1 Each

Lucas contact set.

Part #: GL 202
Condition: New Old Stock, unopened and unused 
Quantity: 4
Cost: $1 Each

Lucas contact set.

Part #: GL 103
Condition: New Old Stock, unopened and unused 
Quantity: 2
Cost: $1 Each


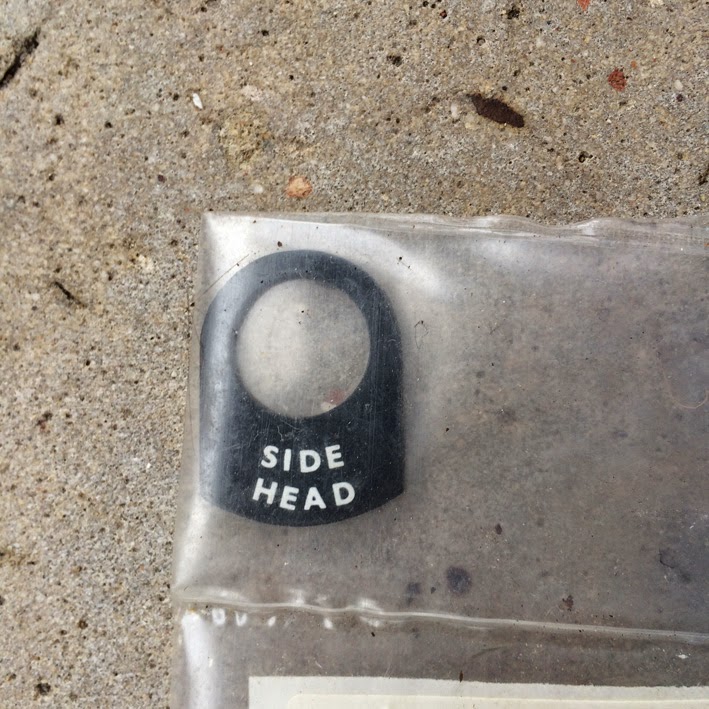
These are mine, not for sale but so chuffed with the find I couldn't help but share!
 Due to its size, this is my favourite find

 New Ignition switch

 One of the two complete taillight assemblies to replace Leif's cracked ones

Seals, universal joint and more beautiful boxes


Monday, 6 April 2015

Item 6: Mercedes-Benz W114/W115 RHS Original Door Mirror

Today I dusted off Jade's door mirror and showed it some love as I prepared it for sale.

Again, I used the superfine wire wool to buff up the chrome; and again the results were wonderful as it polished up beautifully!


With the chrome shining brightly, I removed the glass and cleaned out the inside of the housing, removing 40 odd years of dirt and grime.  The housing has some minor scuffs and a stone chip on the outside, but it is very presentable and therefore usable for anyone using their car as a daily driver.  Luckily the stone chip is on the side closest to the car body so it is not that obvious when on the car.

With a new mirror glass this would be a great replacement for any damaged housing, or indeed, the perfect addition to any of you left-hard-drive car drivers, who would like a period appropriate mirror to put on your passenger door.


Suitable for Series 1 W114 & W115 Variants
Quantity - 1 only
$50AUD excluding postage


Before...

...After

All parts cleaned and ready to be re-assembled

Not perfect but very presentable

New mirror is a must.  
Glass is undamaged so perhaps new foil back is possible

Stone chip = character mark

Not only is it now shiny outside....

 it is shiny inside too!


Sunday, 16 November 2014

Tyro Part Mart - Item 5: Grille


Series 1 Grille

This grille is in amazing condition and is complete with all of its chrome pieces.  It is straight and un-damaged with plenty of shine.  Rosette and star not included.

Suitable for W114, W115 250
Quantity - 1 only
Part number: N/A
SOLD


Saturday, 15 November 2014

De-chromafication

With Jade's bumpers, grille and headlights removed, a phone call from a really nice chap on the other side of the country who needed some chrome for his car, motivated me to get moving with the next stage of Jade's de-chromafication.

I few of the hip line trim pieces were already damaged making these a good place to start to see how easily the parts would come off; after all I didn't want to damage parts that someone else was able to use.

To my I surprised the hip line and sill trim pieces all come off very easily.  All I used was a cloth covered large flat screwdriver, and worked my way along each piece popping the clips out of the holders.  Jade may have been an exceptions as the trim had already been removed one already when Jade changed colour, cars with original paint may not be so easy.

Starting with a damaged one.  
Here you can see the red fixings that hold all the trim pieces in place.  
It is a simple press fixing.

So much chrome, part of the /8's appeal


The quarter panel hip line trim is almost 2metres long!!!

The sill trim for some reason had had new fixings points drilled into the sill which, with little consideration for the old one that were left unfilled, potentially assisted with the spread of moisture and therefore rust within the sills.  Not a good example of "out of sight, out of mind".

WHY??!!!! Why would you add twice as many holes into the sill?

Most alarming was the amount of crud that I found under the rear window trim.  This is of corner to me as UGU already has a rust blister under her back window which I have been trying to ignore, but seeing this I realise that I need to deal with it before winter arrives in June.

It is easy to see how rusting under the back window is so common 
when this much crud gets trapped under the trim.

Thankfully the clever folk at Mercedes-Benz in the late '60's must have know the day would come when I would need to post parts across Australia, so the rear window surround breaks down into several pieces thanks to these corner backing plates.

 Rear window trim as we would see it installed on the car

Rear window trim seen from the back with helpful backing plate holding the trim together 

A few of us have had lengthy discussions on W(A)114/115 debating a topic that gets a surprising amount of back lash from the purists: Chrome wheel-arch mouldings, WAM's for short.

Love them or hate them, WAM's appeal to a lot of people and are a common sight on many classic cars and, on the right body coloured car, I quite like them too, but being from the UK, I like many other people had concerns that they would trap moisture and lead to rust.  However, in our climate in Western Australia, we have busted this myth, it is simply not the case and Jade is another example of that.  Despite the huge amount of rust seemly everywhere in her body, the fenders and in near perfect, rust free condition.

WAM's removed and there is no evidence of rust on the 
fenders despite common misconception

Windscreen bottom lip trim and windscreen wiper cowl

So, with the chrome now all off, it's time to get them packed up and off to their new owner.

What's the next task you ask? hmmm, not sure yet so keep posted.

Sunday, 2 November 2014

Tyro Part Mart - Item 3 Series 1 Steering Wheel


This is the steering wheel that was removed from Jade, 1971 W114 250CE.
There are a few cracks in it but it is perfectly usable or could be restored to be perfect, become the crowning jewel to your Mercedes restoration.

Suitable for W108, W109, W111, W112, W113, W114 & W115 vehicles
Quantity - 1 only
Part number: N/A

AUD $100 excluding postage.


Sunday, 19 October 2014

Disassembly begins

With the decision made to sacrifice Jade to the benefit of others, I set to work removing the interior of the car which despite being filthy wasn't in bad shape.

First I removed the front seats, a simple job of removing four bolts per seat that I had done on UGU many times before.  I then moved onto the back seat, door cards and rear panel cards; again all things I was familiar with from working on UGU.

Drivers seat was the first thing to be removed

 Unfortunately the drivers seat shows wear to the door side, but generally the seats are in usable condition. Note seats are in reverse order in picture

The back seat was/is actually in great condition once the dirt was removed

Back seat with ghostly seat belt pattern

After a wash down, the rear seat is in near perfect condition

With the seats out there was now a lot more room to work in the car.  I turned my attention to cleaning it out.  As with many cars you always find rubbish under the seats that you would rather not have to touch.  Hair brushes, half eaten sweets, bottles of juice, as well as parking tickets and general accumulation of 40 plus years of gunk. On the flip side, I found $1.45 in change and in a rare instance, found the missing accelerator pedal under the passenger seat!

Centre console in excellent condition

As I started to remove the interior trim I was reminded of the excellent build quality of these cars.  Not a single thing broke or snapped as I undid the screws and bolts.  Only one screw in the rear had rusted do the point that I needed to drill it out.

With that said, I have become sceptical as to whether this car has actually been stored inside as I was told by the previous owner.  It may have done; time can also be a destructive source, but the dash pad, rear view mirror and seat belts were so brittle that it seems to me that they have been sitting in strong day light.

Seat belt spaghetti

I removed the centre console which again was pretty easy despite my concerns about it otherwise.  The hardest thing to remove was non Mercedes-Benz stereo which, without the key to remove it from it's cradle could only be removed with the console out.

Aftermarket stereo and a very damaged gear knob

I removed the speaker cables running to the back of the car and all the old mouldy carpet, things were looking better, well cleaner anyway: the level of rust was not looking healthy at all.

The cleanest this interior has been in many years

As you would have seen in my previous post, this car has had a dreadful repair done to the drivers footwell which has allowed water to get into the car and has run back as far as the front seats, but interestingly it looks like this car has also had issues with rust along the length of the passenger side sill that has been painted over perhaps in a bid to stop it.


I cannot for one minute believe this messy black paint work is standard issue Mercedes-Benz which makes me think this is someones attempt at rust prevention

I make reference to this car being "beyond repair".  To clarify, no car is beyond repair if you are willing to pour the money into it. So what I mean is this car is beyond economical repair.  It would cost several times the cars value to repair it, so until my lottery numbers come in, I am not in a position to salvage this car and so, by dismantling it I am hoping to help other owners and enthusiasts, recoup my initial investment in both the car and tools, and expand my knowledge of these amazing cars so that one day I can perhaps bring one back from the brink.  Everything I learn I will share with you via my Tyrobenz blog.

Check out my first Tyrobenz video to find see more about the disassembly process: