
Day 7 - Restoration (12.02.17)
Day 7 got off to a slow start thanks to a pesky snapped bolt holding the windscreen wiper on. With the wiper spindle attached I couldn't get the wiper motor out, and that was the first task for the day - strip down the bulkhead.
Finally, with the spindle off, the wiper motor was removed, closely followed by the mess of wiring. I didn't bother taking note of where anything was connected to as none of it is going back in, nor is the Holden motor. This care free approach made the removal very quick.
With all the wiring removed the bulkhead looked nice and clean in its simplicity.

Wiper motor and wiring all removed

Cleaner looking engine bay with all that messy wiring gone

Wiring spaghetti
" So long, fairwell, auf Wiedersehen, goodbye"
Next I looked to continue disconnecting the engine and gearbox from the chassis, so prop' shafts were next. Thanks to a gift from my brother, a Britpart "prop shaft nut tool #DA1119", this was a very quick job, once I figured out I had to put the wheels back on the ground to stop the shaft spinning, haha; yep, I am a novice at this!
Anyway, if anyone plans to remove their prop' shafts, I highly recommend getting one of these:


Prop' shafts out, and wheels back on the ground!
With the prop' shafts off, and the wiring removed I loosened the final connections to the tub; the fuel filler hoses, and lifted off the tub.

And off it comes!
With the tub off I started brushing the bucket loads of red dirt from the chassis to try and get a better idea of the chassis' condition. I plan to get the chassis sand blasted, or similar, to fully expose the extent of repair work needed, but already I can see there is a lot of work to be done.

I can only imagine this so call "welding" was done when the body was on!

I don't think this crossmember would have been able to tow a paper bag! Cutting the trailer plug into it wasn't the best idea either.

Lord knows what is under this stuff! Lots of plating and cover up. It is all going to need to be repaired/replaced.
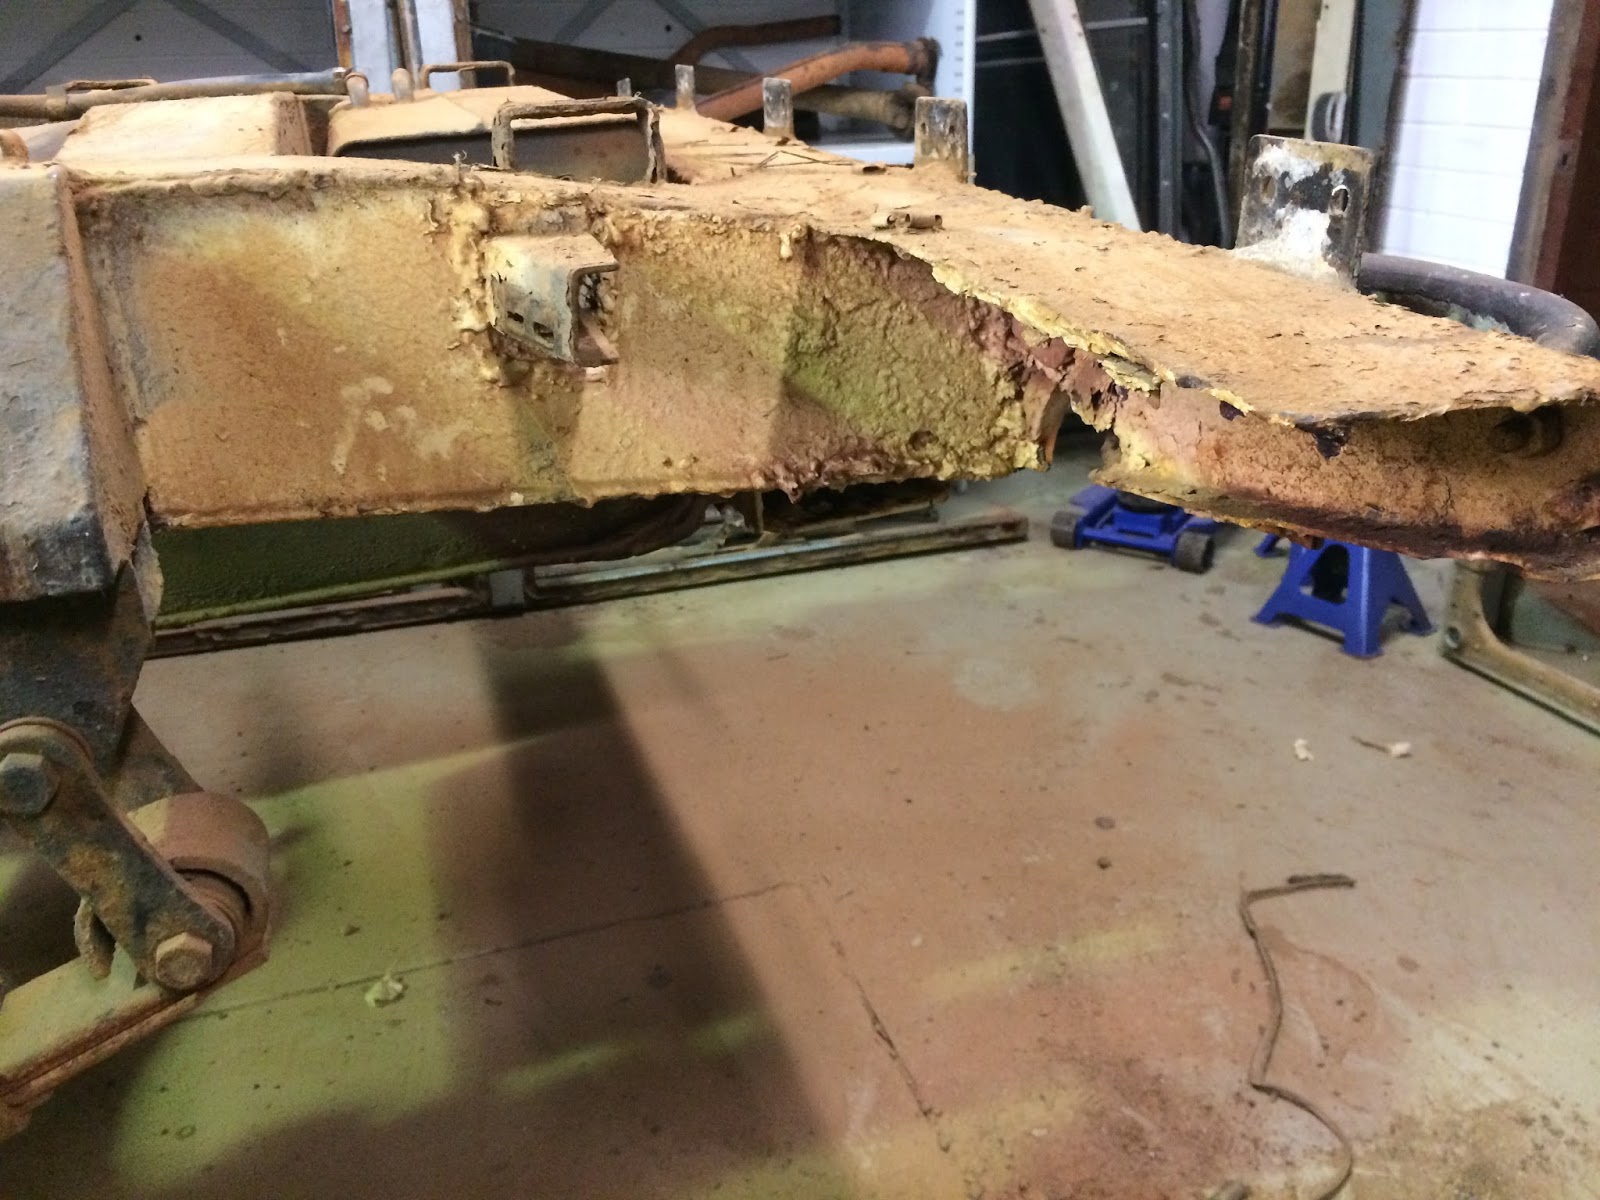
A very, very light weight crossmember with one complete side completely rusted away!

Other side not much better, with the rot all the way back to the fuel filler.

At least this bit seems solid.

Fuel tank yet to come out.

A little bit of Land Rover Tetris

End of Day 7


