Sunday 29 January 2017

Restoration - Day 5

Day 5 - Restoration (29.01.17)

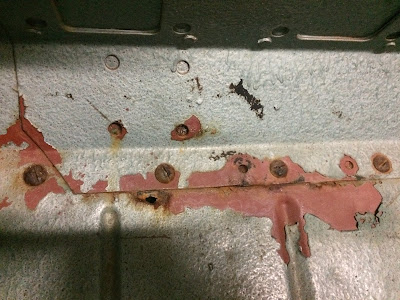
 Day 5 started with drilling out more blasted screw heads, this time to remove the splash guard from the footwell

 Drivers wing removed fairly easily as most of the bolts were missing, presumably from when the engine was replaced

 The passenger side took considerably longer to remove thanks to four silly rusty clips holding the wiring loom to the inner guard

 Some minor rot found on the passenger side door pillar.....

 .... and some on the driver's side.

After being told by people to be careful that the bulkhead might be rotten under the windscreen, I was pleased to find it was as good as new once the windscreen was lowered.


 Windscreen removed and weather seal scraped off revealing the rust free bulkhead

End of day 5

Monday 23 January 2017

Restoration - Day 4

Day 4 - Restoration (22.01.17)


Day 4 and I am really getting to see some of Leif's secrets.  My aim for the day was to loosen all fixings for the rear tub, and I am glad to say that I achieved that, but it took a lot longer than expected, with a few hurdles along the way.

In order to remove the tub, the B-pillars first had to be removed. To do this I had to remove the repair panel that had been added to the passenger side of the tub.  I was really interested to see what the panel was covering and after a lot of drilling of rivets, and grinding of body filler to expose those rivets, the result was somewhat anti-climatic with only a few holes in the original skin; presumably caused by rot due to the water tank behind.  The effort taken to fit the new skin, and the amount of filler used to blend the joint was in my mind excessive, but on the positive note, I now plan to repair the original skin, leaving the tub intact rather than fitting the replacement side I have in my parts pile.

Repair skin - Exposed pink line is where repair panel stops and filler has been used to blend to original panel.  A crack in the filler was an indication to the repair, in addition to the abnormally placed rivets

Thank goodness for friends with the right tools!  This made light work of finding the rivets buried in the filler

Dusty work!

Repair skin removed and original body revealed.  There is definitely no doubt about the original body colour!

There is a lot of filler still to be removed!

Bleeding bullet holes? Haha

Covered up rot

More covered up rot

With the repair panel removed I could access the last few rivets holding the B-pillars in place, drill them out and remove the pillars in their entirety.  

I knew the B-pillars were in bad shape, but I had no idea just how bad.  The C-pillars on both sides are only attached by a lightweight repair which is basically a cosmetic cover up. The B-pillars which I had noticed were a different colour, could now clearly be seen as a rough replacement. I can only assume the original pillars rusted out and this was a DIY repair solution.


B-pillars removed, and very fragile

Drivers side C-pillar completely rotten. I must say it is hardly surprising given the design of this section. The extended sill rail serves no purpose other than to collect mud and trap it. The result is inevitable

Passenger side C-pillar. Yes, as bad as the driver's side

Close up - looks like something from the Titanic!

Driver's side cosmetic cover up piece hiding what is below. This is all that holds the C-pillar to the sill rail

Passenger side cover up
Cover up piece on the driver's side did well to conceal the damage

What I have.......

.... what I would like to have!

The part pictured above is what the B-pillar is supposed to be like, but I am not sure if it is available anymore.  I found this picture on a forum post from 2010 where people were in search of it.  As it turns out this same piece fits Defender 110's as well as Series vehicles.  The difference in wheelbase is apparently in the tub. (please don't quote me on this, but do let me know if you have two of these parts in your possession!)

So, what to do? Well, thankfully I have two spare B-pillar sections from a Series 3, they are old and rusty but hopefully they are better than what I have, and after some internet searching and talking to my brother in the UK, it looks like YRM metal solutions might be the answer:


 YRM Replacement sill rail

YRM Replacement B-pillar bottom

YRM Replacement C-pillar bottom

So, all in all, an interesting da. Next, off with the wings!

Tuesday 17 January 2017

Restoration - Day 3

Day 3 - Restoration (14.01.17)


Back seat out and looking a bit tired. This thing is stupid heavy!

Brackets under the seat, perhaps to store the crank handle? Not sure

Back seat brackets in pretty good shape

You just know these are parts that if you loose them, you just aren't going to be able to find replacements

Grrrrr!!!!! I am sure these floor fixings were a good idea at the time, but it look over an hour to drill every one of them out!

Seatbox sides are a bit ratty so replacements will be fitted. This one wasn't even bolted in!

Casualty to corrosion, missing corner


Trailer light wiring photographed and cut.  The new wiring harness will replace all this

Under-seat battery tray is rusted through and metal tray just shoved in

Underside of battery tray

Seatbox and rear floor removed, finally the chassis can be seen

Interesting that the graphics rail stabilises the b-pillars, kinda like impact protection, haha

Here ends day three.....

Sunday 8 January 2017

Restoration, Day 2

Day 2 - Restoration (08.01.17)

Today was a fantastic day with a lot achieved thanks to help from two friends. As they say, many hands make light work.

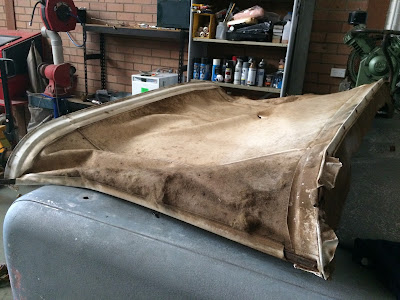
First task for the day was to remove the head-lining, trim and sun visors. The vinyl was very brittle and will need to be replaced 

Rear headlining intact but very brittle and torn

Next, removal of all the bolts holding on the roof.  All but three of the many bolts objected to being removed, two snapped and one very strange bolt saw its demise via an angle grinder.  Despite the nut being held firmly on the back side, and a ratchet on the bolt, it turned and turned but never loosened or tightened, perhaps it was a mis-matched pair?

Roof finally comes loose once the endless amounts of silicon is cut, scrapped and pried off

It's summer and Leif has shed a few pounds and gotten his top off!

End of day: roof and side panels off, as well as the tow hitch which was an absolute nightmare taking two of us over 30 minutes of hard labour

Throughout the day it became evident that the passenger side b-pillar is absolutely stuffed. It is riddled with rust and will need to be replaced. Thankfully, I have a spare!  It appears the roof has leaked at this location for a long time, and silicon has been applied more than once to try to plug the leak with disastrous results. Unsurprisingly, it was this b-pillars bolts that snapped and needed to be cut out.

What seems a bit odd was that both b-pillars show signs of yellow paint not seen anywhere else on the vehicle.  The passenger side I had suspected could be a replacement with further evidence of repairs clearly seen on the tub, but that does not explain the driver's side being yellow.

Mystery yellow paint on passenger side b-pillar

To remove the passenger rear side panel an enormous drinking water tank needed to be removed first. I must say it is a very impressive tank, having been custom made to fit inside the side panel maximising the tank capacity, it has baffles for strength and is beautifully crafted.  I will, however, not be reinstalling it, but I do not want to see it go to waste.

 Water tank removed, volume unknown, but one could go on a long expedition and not be thirsty
 Very neat rivet lines and folded corners

Shaped for maximum capacity

With the water tank out, it is clear to see what the second body skin is hiding; I wonder what caused these?

With the water tank out, holes in the original tub skin can be seen.....

.... and tool box revealed


mmmmmm, yummy! 40+ years of dirt and dried up rubber seals

Ending on a high, some beautifully preserved Mid-Grey paintwork